
The Buena Vista Triathlon is a unique event that required a custom poker table. Poker is the third event of the triathlon. The first two events are golf and horseshoes. Super cool, right?!
My brother-in-law, Steve, and I host the BVT. It’s always 12 guys and for many years we made the poker event work with all of us standing around a folding table top that we put on a picnic table. After the first few guys went out, we’d eventually be able to get more comfortable sitting, but it didn’t change the fact that we were playing on a makeshift poker table.
The picnic table rocked from side to side. It wasn’t long enough to support the full length of the poker table top, so you could rest your arms on one end and knock over the adjacent chip stacks. The creases in the table top didn’t allow you to slide cards or chips smoothly.
Custom Poker Table Requirements
Every year, Steve and I would say, “we really need a custom poker table.” Every year, we didn’t have enough time or money. But 2025 was different. My full-time job slowed down at the right time and it made me want to tackle this project. The first step was to nail down the requirements of this custom poker table.
- Over-sized. The table had to accommodate 12 players. A standard poker table has about 24 inches of rail per player. So 12 players times 24 inches equals 288 inches. After fussing with my calculator a bit, I decided the table would be 10 feet long and 44 inches wide. This created a table circumference of 290.23 inches, or 24-3/16 inches per player. And because of the length, the table would need to fold in half for storage.
- Limited budget. Technically, the Buena Vista Triathlon was more of a beneficiary than a client. We didn’t want to charge the guys for this so we decided to pay for it ourselves. Because of this, I made several concessions in the design to allow for a more cost effective table. The table would have speed cloth and padding, but it wouldn’t cover the entire table. The upcharge for an oversized speed cloth was steep. The table would not have a padded rail – again, the upcharge for an oversized padded rail was steep. The legs would be steel, folding legs – not good looking, but inexpensive.
- Cupholders. Spilled drinks are a part of poker. To help with that, I wanted oversized cupholders – ones that could hold a Yeti Rambler or red Solo cup. But for budget purposes they would be plastic rather than steel.
Custom Poker Table Build
I started with four sheets (4 foot x 8 foot) of 3/4-inch Radiata plywood. On a 10-foot table, each half was five feet long so the first step was to cut the sheets into five-foot lengths (leaving scraps of three-foot lengths). I didn’t take any pictures of this, but I always break down plywood sheets using my circular saw and a Kreg straight edge guide. Then I turned the sheets the other way to cut them down to 44 inches wide.
As a side note, this project made me wish for a fancy track saw. Even with my garage door open and a fan blowing across the plywood and out the door, my circular saw produced a cloud of sawdust with every cut. Between cuts, I would get out my leaf blower to clear the air. And yet, my circular saw and straight edge get perfectly adequate results. This Makita track saw has been on my wish list for a long time!
Cutting a bunch of half circles
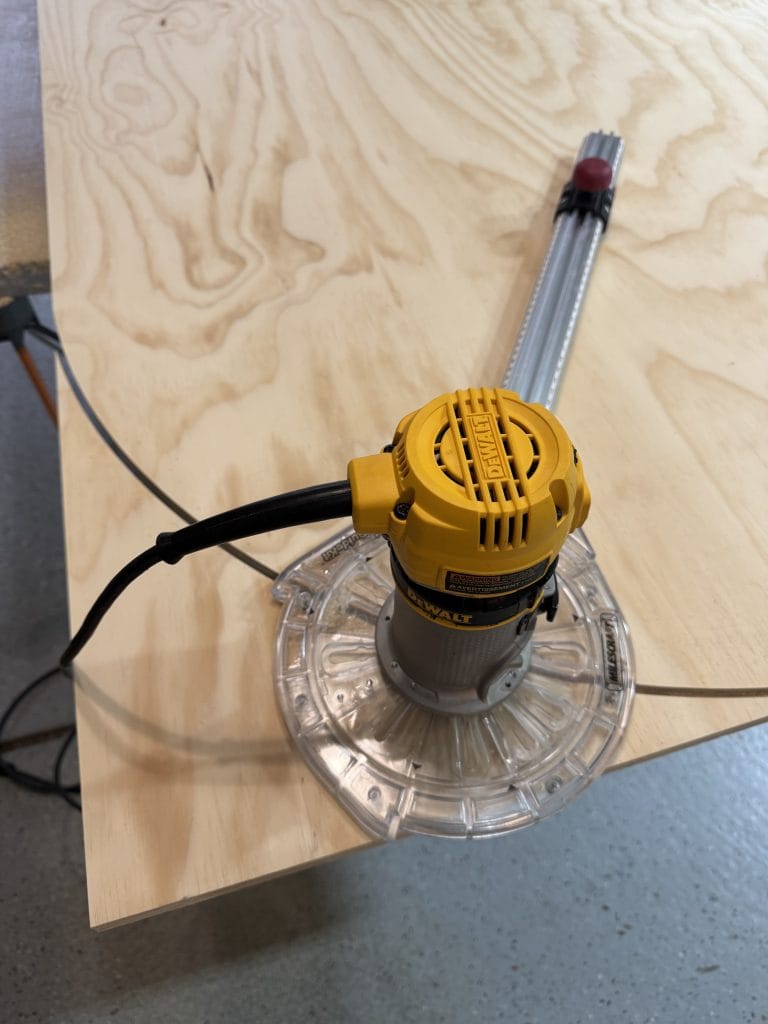
Next, it was time to make the radius cuts. This was my first time using the Milescraft Circle Guide Kit, which I reviewed in another post. I carefully measured to find the center point of the circle exactly 22 inches in from each side as well as the end of the sheet. I set the radius bar to the same length and made the cut in three passes.
While the radius bar was set to 22 inches, I did the outside radius on all four of the sheets I’d just cut. Two of the sheets would serve as the top rail and the other two would serve as the racetrack (the middle layer, as you’ll see later).
Then I adjusted the radius bar to cut the inside of the top rail. The rail would be five inches wide to accommodate cupholders. Repeat for the other half of the table. Note that this cut – the inside radius of the rail – was also the outside radius of the bottom layer. And then I adjusted the radius bar to cut the inside of the racetrack. Repeat for the other half of the table.
I’m not sharing measurements here because these were inside cuts. In other words, I wanted a specific amount of wood on the outside of the cut I was making. I adjusted the radius bar until the router bit was in the correct position for the rail (5 inches) and the race track (13 inches).
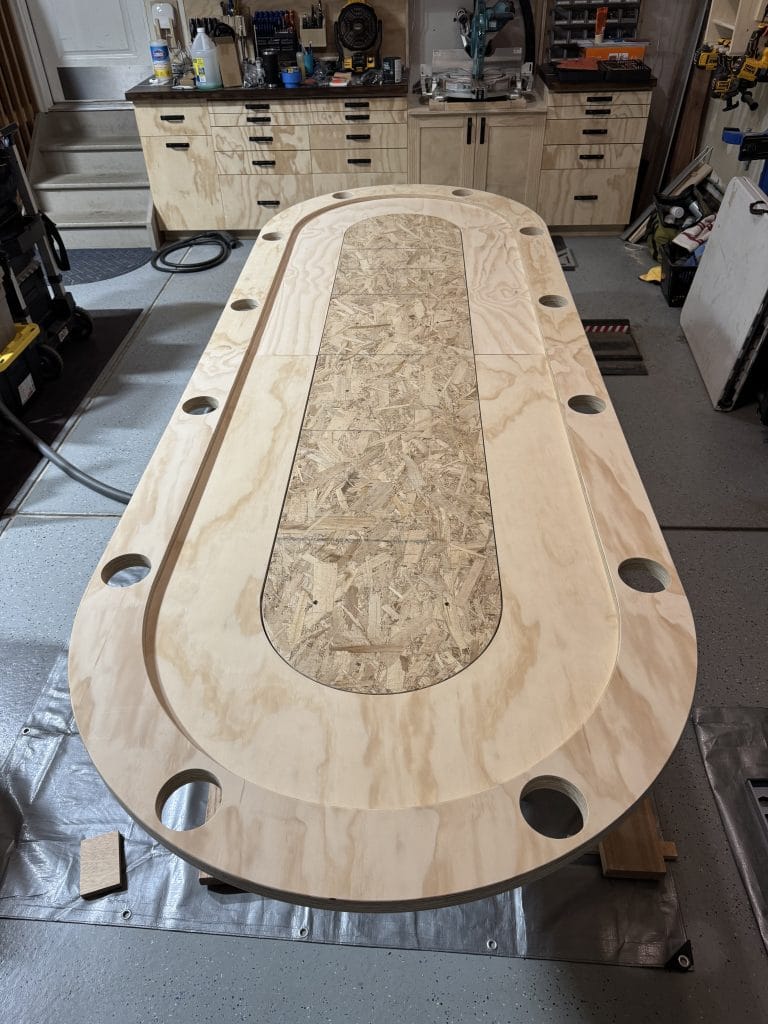
It’s easier to see what I mean in the picture below. This is both halves of the racetrack, cut from 5 feet long by 44 inch wide pieces. This is the primary reason this is a custom poker table – standard poker tables are around 8 feet long. The racetrack itself is 13 inches wide. At this point, I’ve also cut the piece I need for the playing field out of OSB. It’s about 7 feet, 10 inches long and 18 inches wide. I used uglier and cheaper OSB knowing it would eventually covered with speed cloth.

Assembling the table top
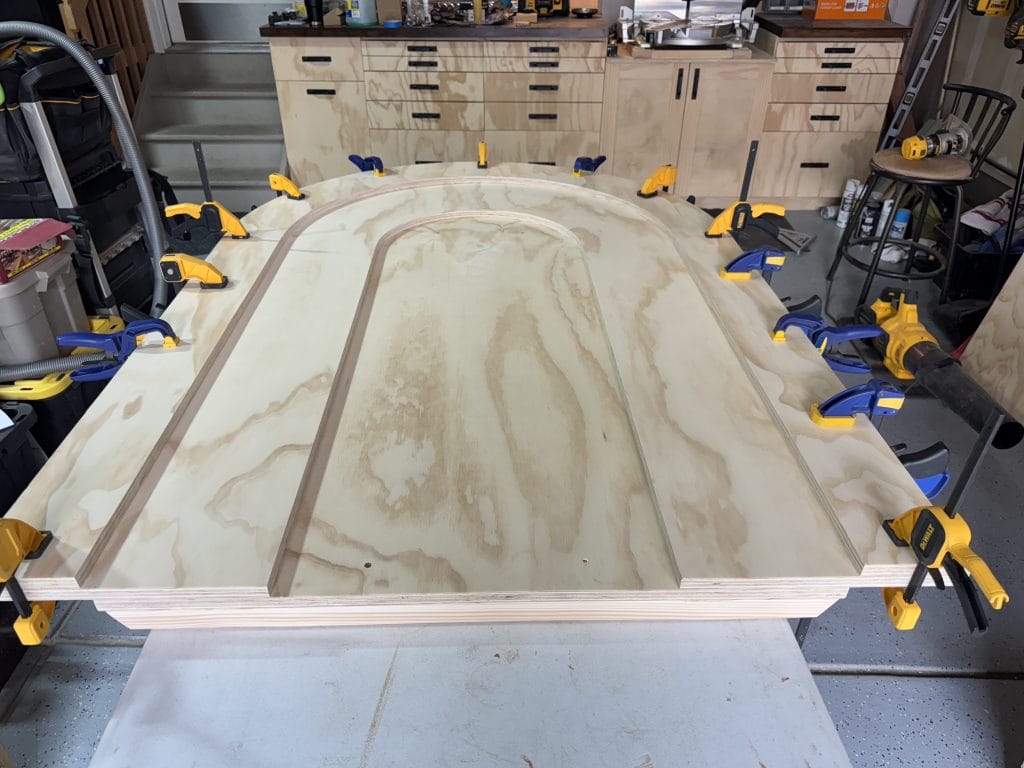
I decided to glue and screw the rail to the racetrack. I figured it’s where guys lean on the table with their forearms.
The bottom layer is also attached to the racetrack with glue and screws. Sorry, but I didn’t take a picture of that. The bottom layer is the piece that supports the playing field. Take a close look and you can see it fits between the rails. That’s because it’s the piece that I cut to make the rails!
Next, I marked and cut all of the holes for the cupholders. I used a 3-5/8 inch hole saw. Using the outside of the rail, there is 24-3/16 inches between the center points of the holes. On a related note, I think players should sit with the cupholder directly in front of them as it greatly reduces the probability of a spilled drink. What do you think?

In this photo, I set up the full table to test fit the playing field. I wanted a snug fit inside the racetrack, keeping in mind the playing field is wrapped with padding and speed cloth. I did a lot of sanding to ensure there was a 1/8 inch gap all the way around the playing field.
Installing the legs
The table top is upside-down on the floor so that I can install the folding legs. I used these 2x4s as cross braces, both to ensure a strong joint and to protect the legs when the table is folded.
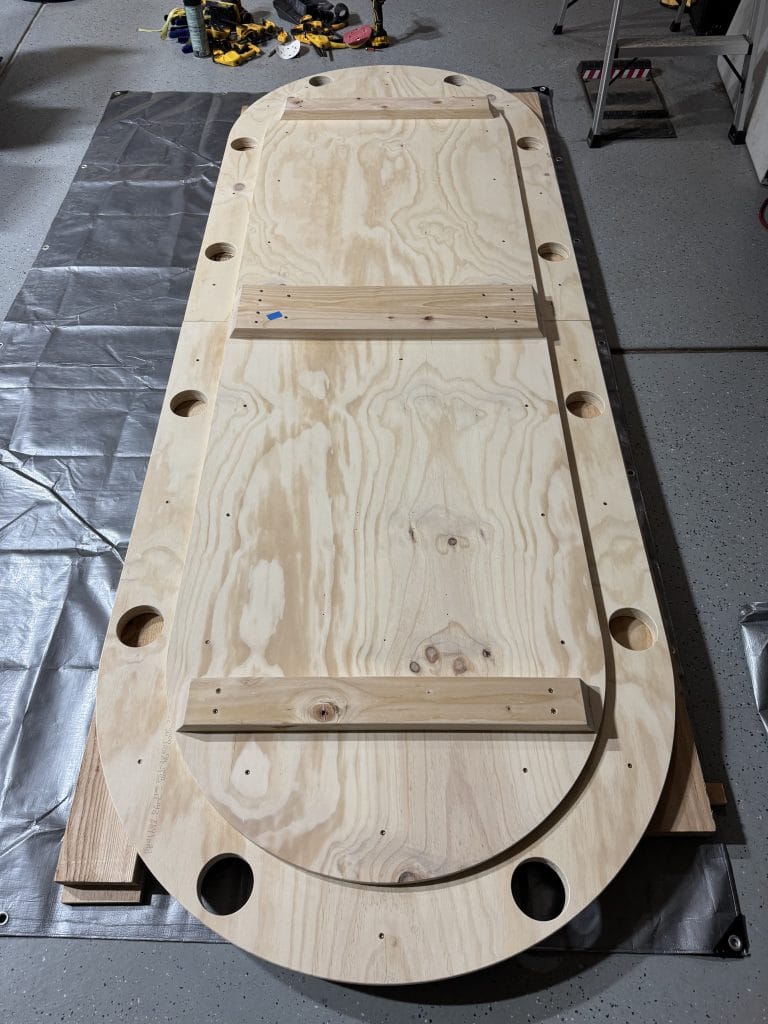
In this photo, you can see that I’ve installed the hinges as well as the legs. These are 3-inch, heavy duty hinges with 2-1/2 inch screws.
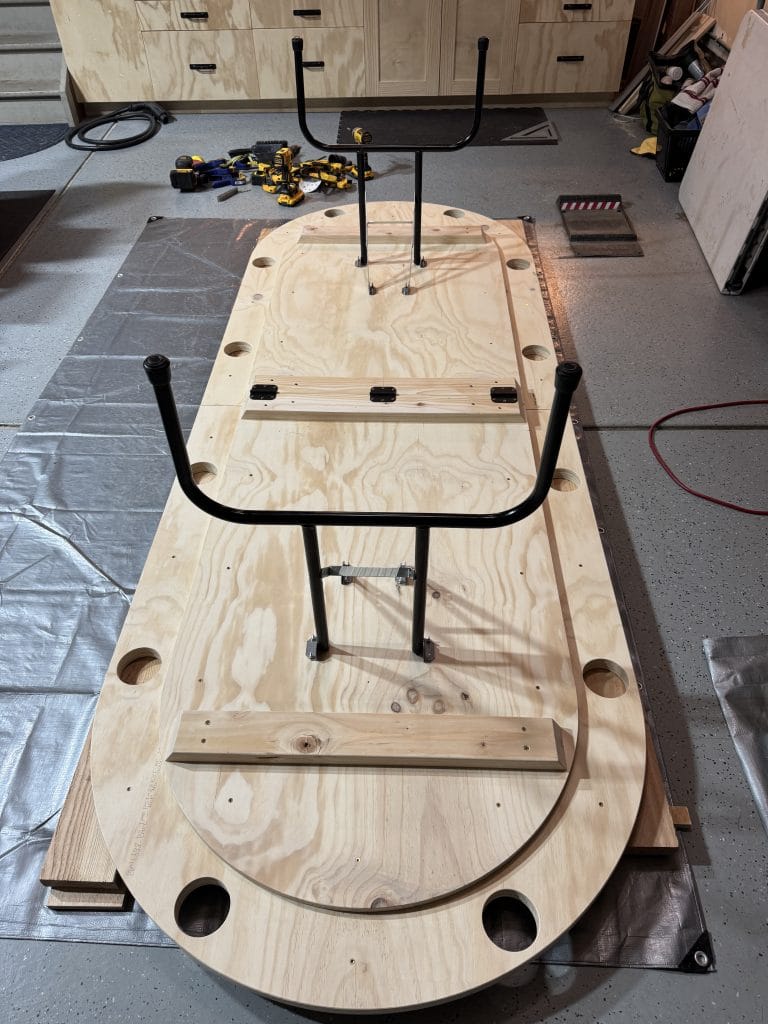
By now, you’ve probably figured out the table folds with the legs to the inside. It would have been better to put the table top to the inside (better protected), but that would have required putting hinges on the top rail. I’m not sure that would have been strong enough given the weight of the table. It also would have required some bracing to prevent the middle of the table from bending toward the floor. Also, who wants to see a hinge on the top rail?!
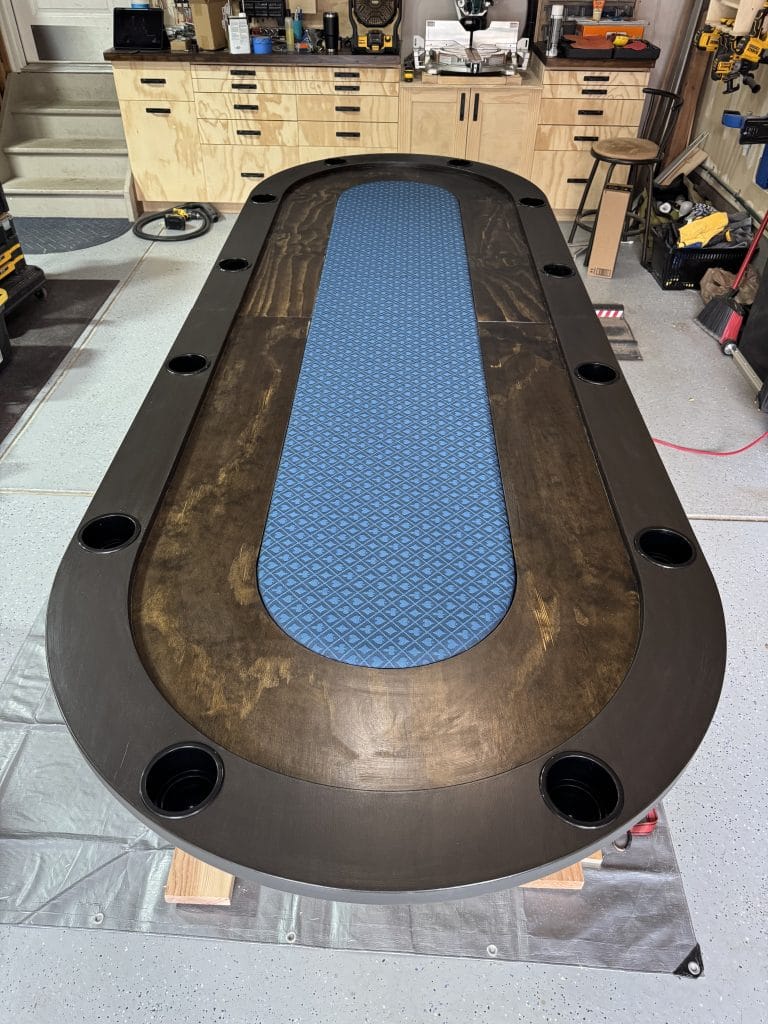
Finishing the custom poker table
For this custom poker table, I decided to use a dark walnut stain for the racetrack and an espresso stain for the rail. I did two full coats of stain, another round of touch-up, and then two full coats of poly. Very light sanding between each coat of stain and poly. I think it turned out pretty good.
FYI, the playing field is secured to the table with screw inserts in the OSB and knobs that screw into the playing field from the bottom. There are eight screws, four in each half. It’s probably over-kill, but the longitudinal strength of the table was important.
Lessons learned
I put about 50 hours of work into this custom poker table. In a project this big, there are always some lessons learned.
- At the top of the list, I would have put a pre-stain wood conditioner on the racetrack. This would have mitigated some of the over saturation that is common when staining plywood. I should have remembered that, but it was near the end of the project and I was worried I wouldn’t finish it in time.
- I used spray adhesive to attach the foam padding to the playing field, but I did not use any spray adhesive between the foam padding and speed cloth. It’s fine and nobody notices it except me, but I would have preferred the speed cloth to lay more flat. I’ve done this on other poker tables I’ve built – I just didn’t think it was necessary here since the playing field was only 18 inches wide.
- A sheet of OSB is just 40% of the cost of a sheet of plywood so I thought I was pretty savvy using OSB for the playing field. But I ended up losing a lot of time working the OSB into shape. First, it required a lot of sanding. Second, it made a huge mess using a router to cut the half circle ends. And third, the strands kept peeling up at the edges so I ended up applying a coat of poly to get that under control. In the end, I think it was more trouble than it was worth.
I’m glad to finally cross this project off my list. It doesn’t go in the revenue column for Moto Woodworks, but the guys and especially my brother-in-law were very appreciative and, who knows, I may yet get a project out of it. Let me know if a custom poker table is in your future!