Laser engraved photos were the very first project I did when I got my xTool P2S laser. Why am I publishing this post now, almost a year after I got the laser? At the time, I think I was more interested in using the laser than writing about it. Plus, I didn’t think anyone would want to read about a laser rookie’s first laser project. Then someone asked me on Twitter (I refuse to call it X) what my first laser project was and here we are!
Use appropriate photos
The disclaimer with photos is that I’d rate my Adobe Photoshop skills a B. That means it’s a C but I’m too proud to admit it. I’m pretty good with most software because of a career building software, but that’s also my weakness. I think I can learn to use any software in about 10 minutes. It’s not true.
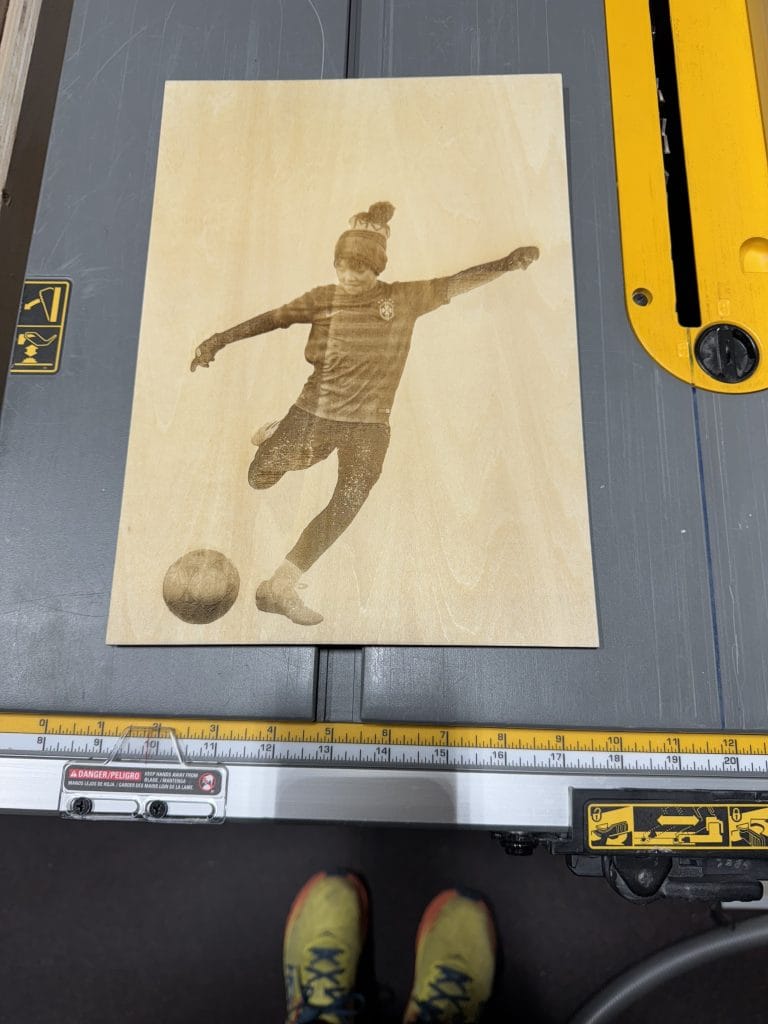
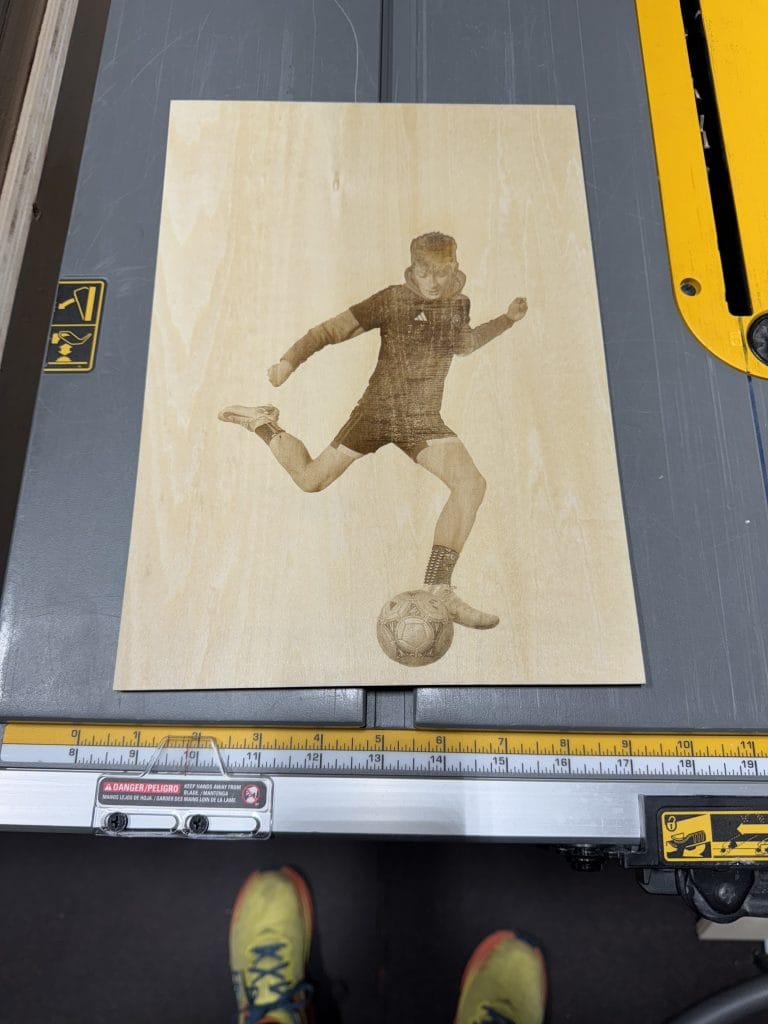
Anyway, I know enough about Photoshop to pick photos where it’s easier to remove the background. There’s a “remove background” function that does most of the work for you, but the less work it has to do the better the result. My boys are competitive soccer players, so I chose these pics where the background is mostly the field. Excuse me, the pitch. I’m still learning the game.
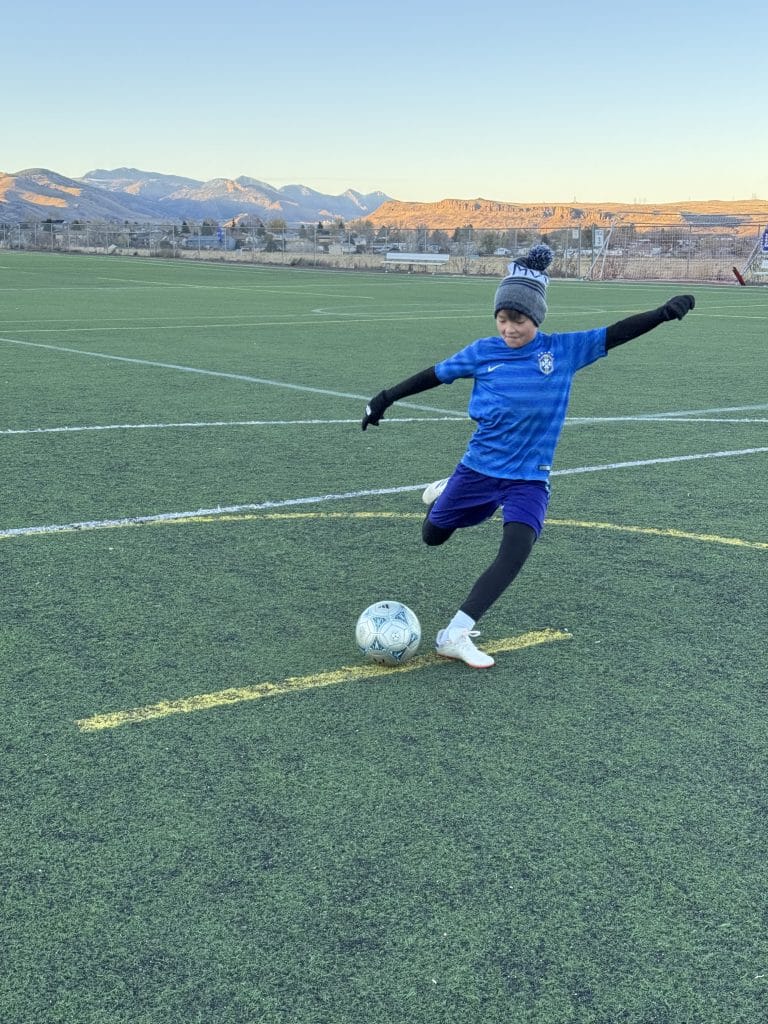
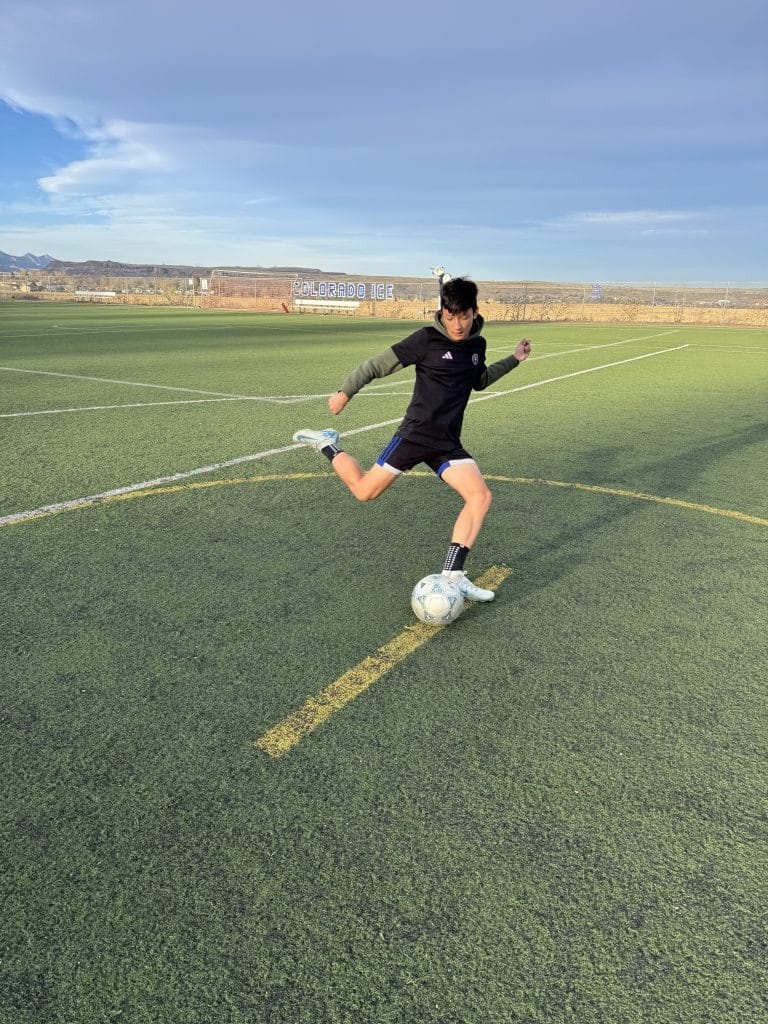
When I took the photo of Kade, on the left, I was positioned about five yards in front and to his right. I got a good photo, but he nearly took my head off in the process. So when I took the photo of Tag, on the right, I moved more to the side. The result is that the ball is in a different position relative to the left foot. I didn’t realize it at the time, but this would prove to be a very time-consuming problem when removing the background.
Remove the background
In Photoshop, the “remove background” function removed the ball from the photo on the left, but kept the ball in the photo on the right. I tried using a couple of free website services to remove the background, but got mixed results. Those that kept the ball tended to also keep the yellow line that the ball was on. And most of them left a small bit of the background around the silhouette of the body. In the end, I went back to Photoshop and used the eraser tool to remove the background by hand. It took a long time, but I got the result I wanted.


Experiment with laser settings
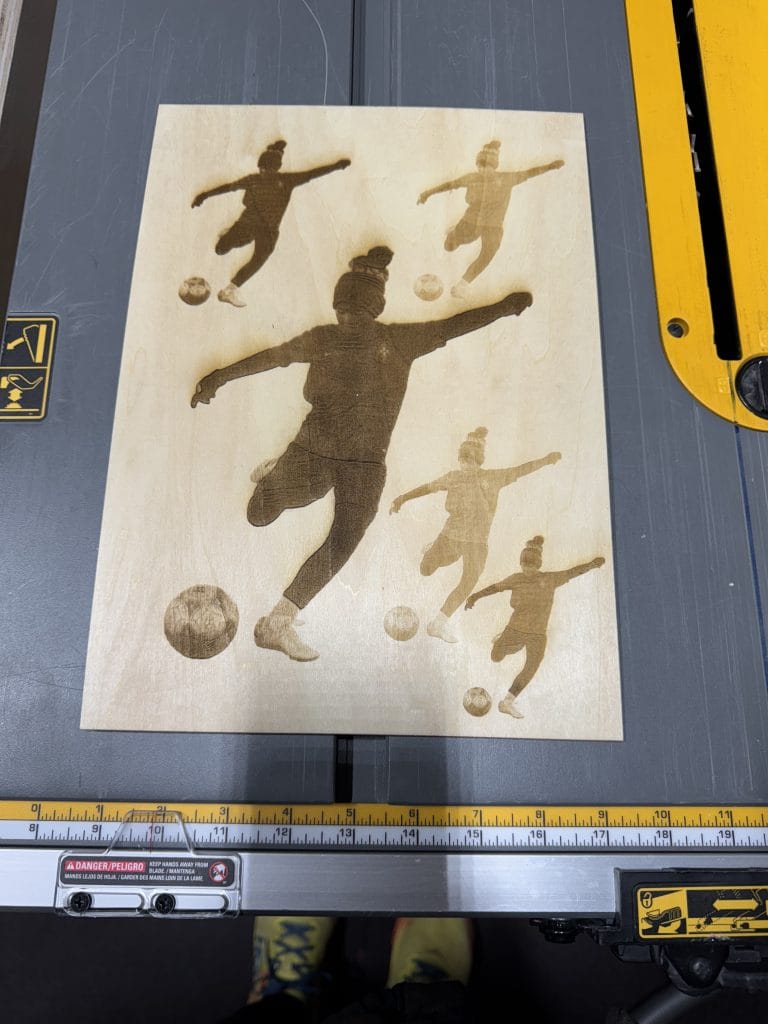
Laser engraved photos have a lot of detail in them, so it took me several tries to find the settings that worked best. I wanted a dark burn but started with the power too high. Too much detail was lost. I gradually eased off the power and added speed until I got what I wanted. There are multiple combinations of power and speed that can produce the same result, so don’t worry about finding the perfect settings.
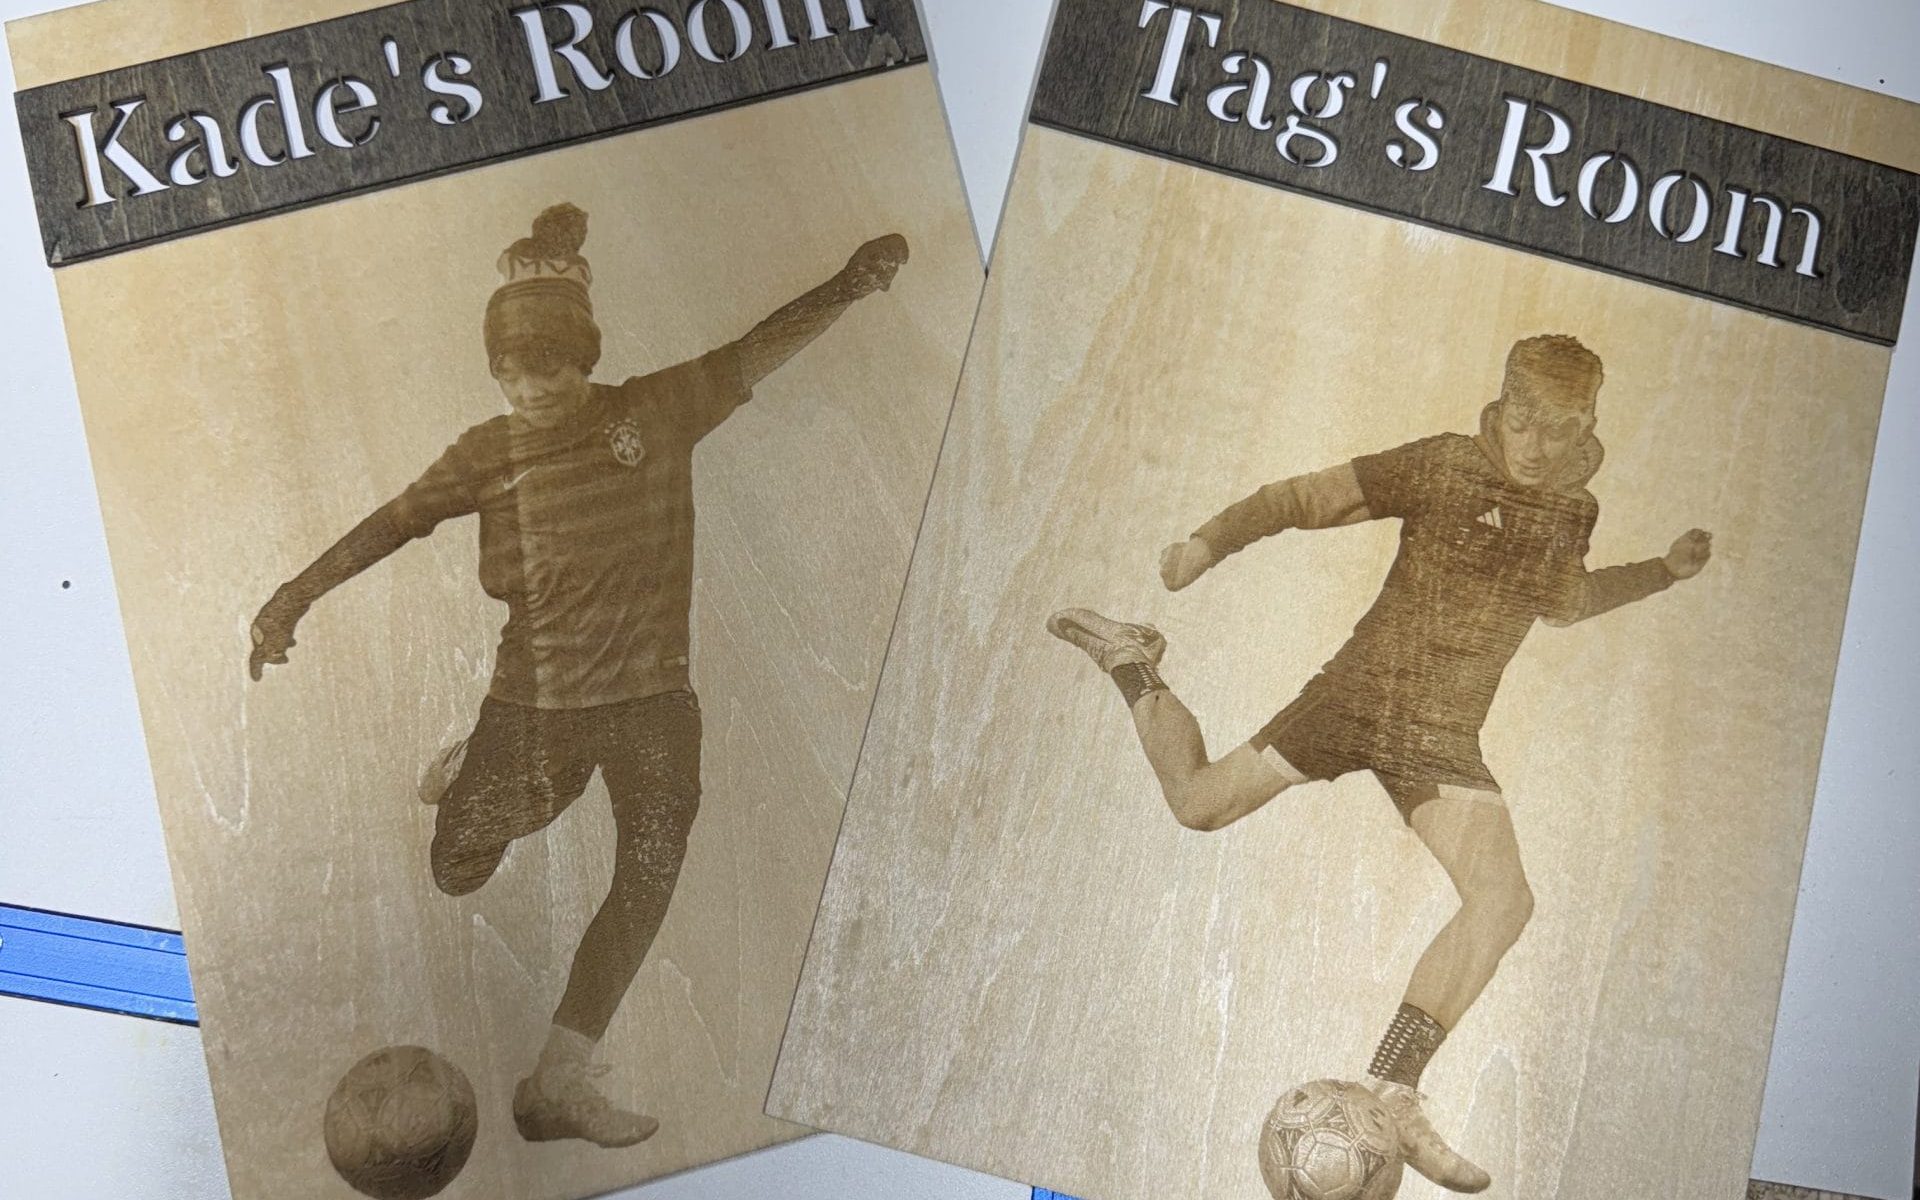
The final engravings turned out pretty good. I gave each a light sanding with 240 grit and coated them with some wipe-on poly. My one minor regret is that the one on the left has a bit of grain running vertically through Kade’s torso. I should have sanded the sheet before doing the laser engraving. Live and learn.
Laser cutting is cool
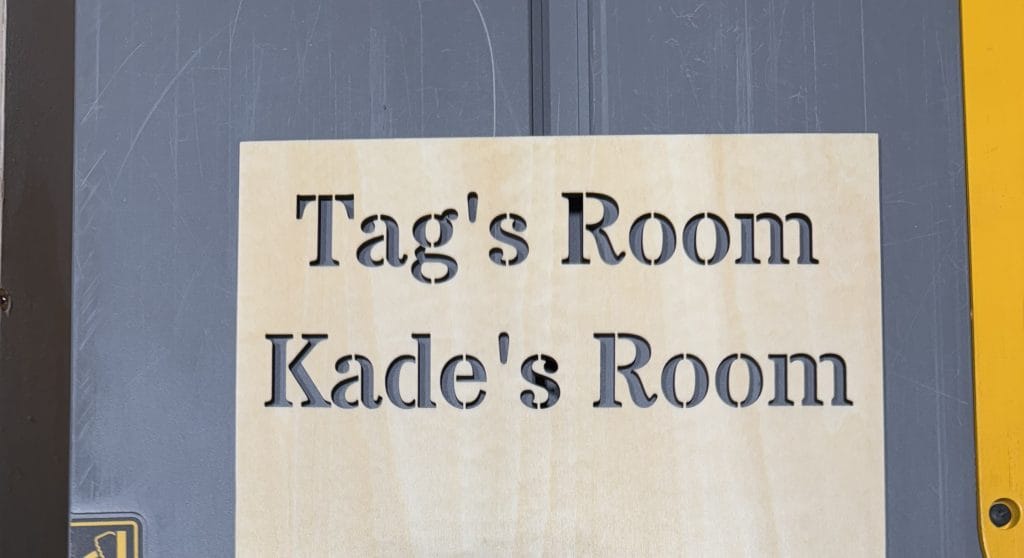
You may have noticed I left some extra room above the photos. I knew I wanted to add some text to these laser engraved photos. The text could have been laser engraved at the same time as the photos, but as this was my first laser project, I wanted to also try laser cutting. It added a bit of depth and variety to an otherwise flat piece.
The finished product
I stained the pieces with text because I wanted the lettering to stand out. But then at the last minute I thought I needed to also paint the boards white underneath the cutout text to make double sure the lettering stood out. I regret that. In my opinion, the white lettering looks out of place. It’s the only part of the project that doesn’t show the grain of the wood. Again, live and learn!

Laser engraved photos turned out to be a great first project on my laser. I learned a lot about how I would do laser engraved photos in the future. I learned a lot about how the xTool P2S works – how much noise it makes and smoke it produces, how long different engravings and cuttings take, how to set up jobs in the xTool Creative Space software, and more!
PS – All of this work was done using 12 x 18 x 1/8 inch basswood sheets. If you’re interested, check out my product review of these basswood sheets.