I’m surprised how often I’m asked, “How did you choose your first laser machine?” The short answer is I chose the one I thought would best meet my needs. But let me take you through the process in more detail.
To set the stage, I’m new to laser engraving and cutting. This is my first laser machine. I’ve never even used a laser machine. I don’t have any prior laser experience to guide my purchase decision. But over the course of my 30-year career in software startups, I got a great deal of experience making capital purchase decisions. Step one is to make sure I know what I’m going to use the laser for – the expected use cases.
Expected use cases
Lasers can cut several types of material and engrave many more. The applications are limited only by the maker’s creativity. So when thinking about the expected use cases, I wanted to be realistic about what will drive the business. I can make all kinds of things but the early focus was and is on ROI (return on investment).
The first use case for me was a business sign at the preschool that my wife and I own. We wanted to update the main sign that faces the street, a two-sided 4′ x 8′ sign with a logo and some business information. It’s some tedious router work on a sheet of MDF with two colors of paint. We got a quote for $4,000, which wasn’t necessarily out of line, but it was enough to make me think about making the sign for less.

The business case got stronger as we thought about all of the other signs on campus. They are all smaller than the main sign, but there are a lot of them. And that’s not including signs inside the buildings. It was easy to see how I’d be able to cover the initial cost of a laser machine just with jobs at the school.
I knew that a more sustainable business would have to attract customers beyond the school. The idea was to build a portfolio using signs created for the school. I would then use that portfolio to generate business from other local business owners. In the beginning, I wanted to focus on B2B sales where I could deliver products in person, get to know my customers and their businesses, and avoid shipping hassles.
Of course, there were many other use cases under consideration. Educational toys for the school, custom engraved cutting boards, maps for new home buyers, and more. But at least early on, business signs would be the revenue driver and the way I covered the cost of the laser machine.
Laser machine criteria
Step two was making a list of the criteria for the laser machine. What features or characteristics would the laser machine need to efficiently produce business signs?
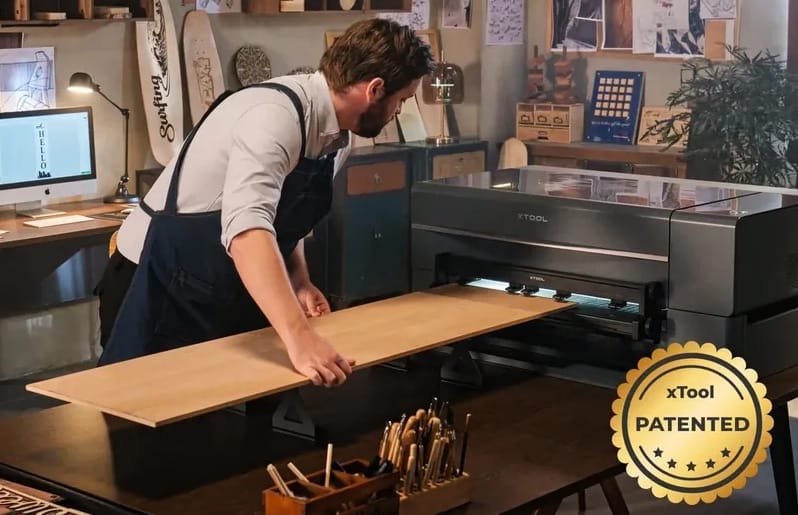
- The machine needed to produce a finished sign of roughly 4′ x 8′. In a desktop model, this meant the machine needed to have a conveyor system that allowed an 8′ strip of wood to be fed through the machine. If the bed accommodates material that is 16″ wide, three strips of 16″ x 8′ could be put together to make a finished sign of 4′ x 8′.
- I wanted a somewhat portable desktop model. I couldn’t decide if the laser would sit in my basement or in my garage, and I didn’t think I’d be able to make that decision until I had a chance to use it for a few months. That and my budget didn’t really allow for a bigger machine anyway.
- I set a budget of $7,500 for the laser machine and supporting accessories. This was mostly a function of how much of my savings I was willing to risk on this endeavor, but I did enough research to confirm the budget was enough to enable my potential success.
Laser machine comparison grid
Step three was to identify the contenders. The xTool laser machine was the odds-on favorite throughout the search process because it’s the only one with an automatic conveyor. Nevertheless, I forced myself to review at least two other machines. It helped me learn more about lasers, the manufacturers, and the user communities. I included the Glowforge Pro HD and the OMTech Polar because they are desktop models with pass-through capability. For the cost, I configured each machine with similar features.
| Machine | Size | Pass-Through | Cost |
| xTool P2 | 39.4″ wide x 25.1″ deep x 10.6″ tall; 99 lbs | Auto Passthrough Technology can feed material up to 0.55″ thick, 23.6″ wide, and 118″ long | $6,428 includes laser, conveyor, extension rails, riser base, rotary, fire safety set, smoke purifier, and materials kit |
| Glowforge Pro HD | 38″ wide x 20.75″ deep x 8.25″ tall; 11 lbs | Pro Passthrough slot can feed material up to 0.25″ thick, 20” wide, and as long as desired; no conveyor, material is fed manually | $8,294 includes laser, air filter, and materials kit (incapable of rotary) |
| OMTech Polar 350 | 38.2″ wide x 22.3″ deep x 9.2″ tall; 104 lbs | Passthrough slot can feed material up to 0.19″ thick, 14.1″ wide, and as long as desired; no conveyor, material is fed manually | $3,430 includes laser, rotary, air purifier, and materials kit |
Conclusion
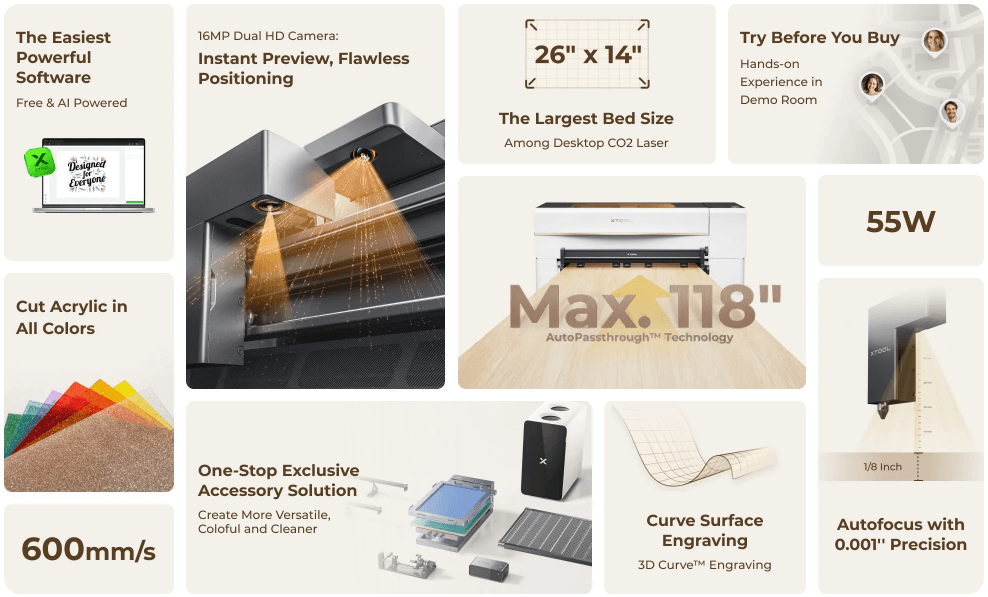
For my criteria, the xTool P2 was the clear winner. That doesn’t mean it’s the best laser machine. It means it’s the best laser machine for me. It meets my use case, is somewhat portable, and fits in my budget. That said, the xTool P2 has other features that helped me get comfortable with the purchase decision.
- The laser is faster (600mm/s) and more powerful (55W) than the competitors. I can cut 20mm acrylic or 18mm black walnut in a single pass.
- The working area is larger than that of the competitors, both in terms of the flat bed (23.6″ x 12″) and the height (8.5″). I won’t be limited to engraving on sheets of acrylic or wood. I’ll have the flexibility to try 3D objects such as balls, boxes, growlers, etc.
- The dual HD, auto-focusing cameras allow for engraving on curved surfaces and live previews. Note that a curved surface isn’t quite the same as a tumbler. When engraving on a tumbler, the rotary mechanism rotates the tumbler so that the laser remains a fixed distance from the surface. When engraving a curved surface – say, the inside of a bowl – the laser moves down as it nears the bottom and up as it nears the edge. I’m not sure I’ll use this feature much, but it’s nice to have.
As a first-time laser machine owner, I also put a lot of value on company service and a strong user group. I’m particularly intrigued by the xTool EasySet Library, an online resource for finding parameter grids tailored for xTool. These grids provide the ideal settings for various materials and machines and should be a huge timesaver.
Update
Just one week after receiving my P2, xTool released the P2S. Boo! After watching the launch video, I decided to return the P2 and purchase the P2S. This meant paying a 5% service fee but xTool would cover the return shipping cost. None of the improvements are ground-shaking. I just hated the idea of forking over that much money to have an “older” model that went out of date before I had even opened the box.
On a related note
I thought you might be interested in the first project I did with this laser machine. I decided to laser engrave photos!