
I took on a job to produce the awards plaques for Colorado Trout Unlimited. These are annual awards that recognize individuals and businesses for outstanding contributions to the organization and its mission to protect rivers in Colorado.
Background

David Nickum, the Executive Director of Colorado Trout Unlimited, and I go way back. He was the Executive Director when I was the President of the board. It was challenging work that often involved late nights and weekends, but we had a shared passion for rivers that drove us to do a lot of good things.
I resigned from the board a long time ago, but stayed in touch with David. We recently caught up over a beer. I shared my woodworking side hustle and he happened to be looking for awards plaques. And that’s really all it took!
Job Scope
He sent a black and white logo in vector format along with the names of the awards and winners. I mocked one up in xTool Studio and we quickly agreed on the design and fonts. We originally talked about making the 8-inch by 10-inch plaques out of cherry, but I didn’t find any in stock at a couple of nearby lumber stores. Both stores offered to order the wood, but I didn’t have enough time to wait for a delivery.
I substituted poplar because I know it looks good laser engraved, was in stock, and less expensive than cherry. Surprisingly, the poplar boards were cheapest at Home Depot. The job called for 14 finished awards plaques, so I purchased 17 linear feet of poplar. Always buy extra! You’ll need some to dial in your laser settings and some to account for any defects (eg, chips, knots, sap marks, etc.).
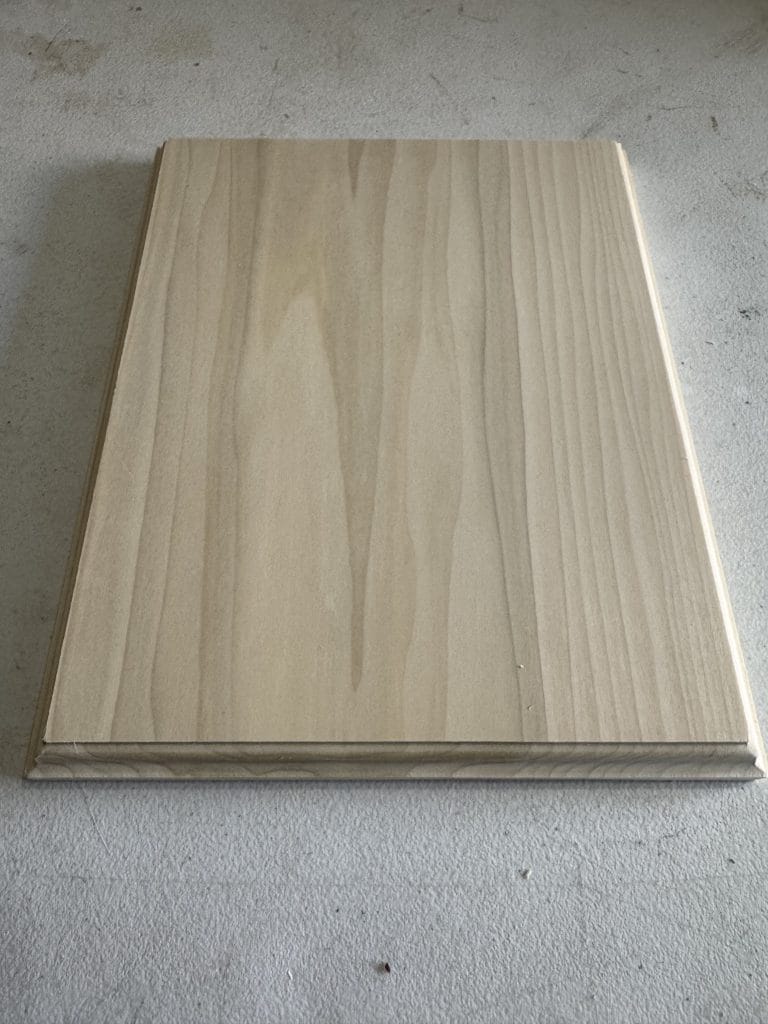
Preparing the boards
Step one was to sand the boards using 120 grit sandpaper. I mostly wanted to remove the scuff marks that come from shipping and it was easier to do this before cutting them down.
In step two, I cut all of the boards to size. I did the cross cuts on the miter saw and the rip cuts on the table saw.
In step three, I used a roman ogee bit to router the edges.
In step four, I used 240 grit on the faces of the awards plaques.
Laser engraving the awards plaques
I ran several tests on scraps and had my wife help me choose the settings that looked the best. On my xTool PS2, I used 25% power, 200 mm/sec speed, and 120 lines/mm resolution.
This is the point where I get really nervous! I should set up a plaque and run it, but if it doesn’t come out perfect then I’ve wasted a board. It makes me want to test again, which is dumb because I already did that. And so, this is when I usually crack a beer. Liquid courage!
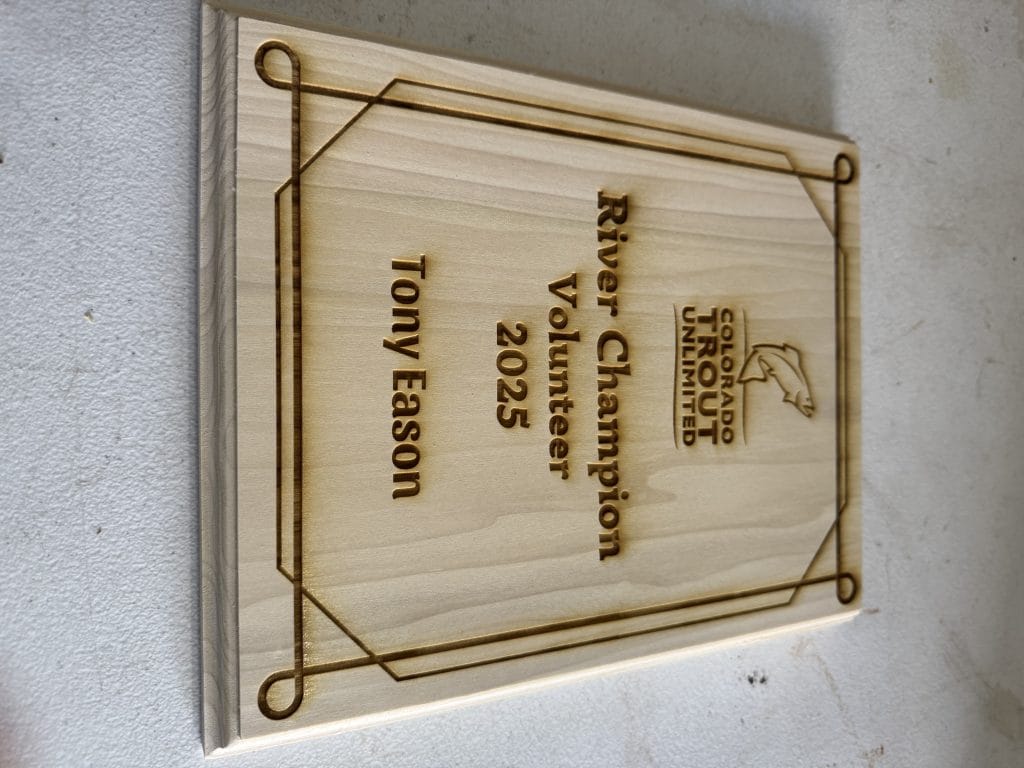
Step five was to engrave the plaque. Here’s what the plaque looks like coming out of the laser. In my opinion, this is perfect for this application. I’m erring on the side of creating some scorch marks, but those are easily sanded out. The result is a darker, more consistent burn that provides nice contrast on poplar.
Each plaque took 45 minutes to engrave and I ended up engraving 16 of them (two were defects) – that’s 12 hours! I cleaned the laser head after every plaque, the screens in the laser every fourth plaque, and the mirrors every sixth plaque. That’s probably more than necessary, but I really couldn’t afford to lose any more boards.
Step six was to remove the scorch marks. I used 240 grit sandpaper and I think that was the right choice. I should have realized this earlier, but I suddenly realized it would be super helpful to make a jig to hold the plaque while I sanded.

Finishing the awards plaques
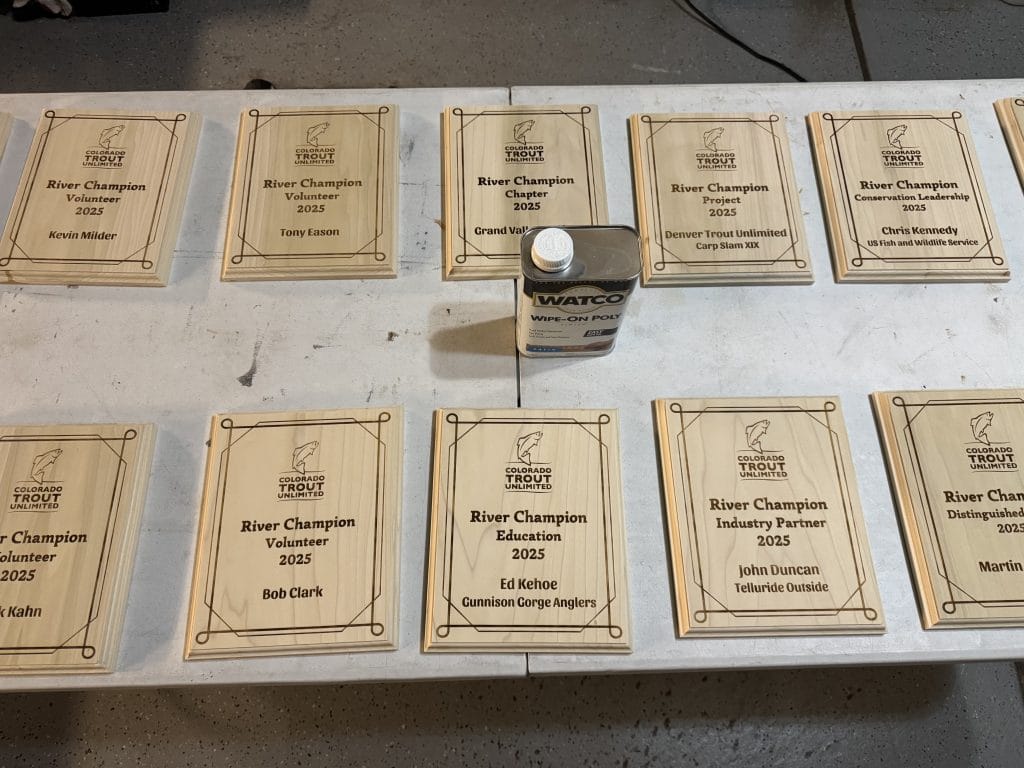
Step seven was to prepare the awards plaques for finish. I used an air compressor to blow off the dust from sanding. In the past, I’ve vacuumed, wiped with a dry cloth, and wiped with a damp cloth. All of the methods work, but an air compressor is best for getting the fine dust out of the engravings themselves. This is especially true for finer or deeper engravings.
In step eight, I used Watco Wipe-On Poly in clear satin. This has been my go-to finish for a while, but more out of convenience than product testing. Please let me know in the comments if you have a product you’d recommend. I did one coat on the backs and two coats on the fronts, taking care to make sure it soaked into the engravings. I let the poly dry overnight.
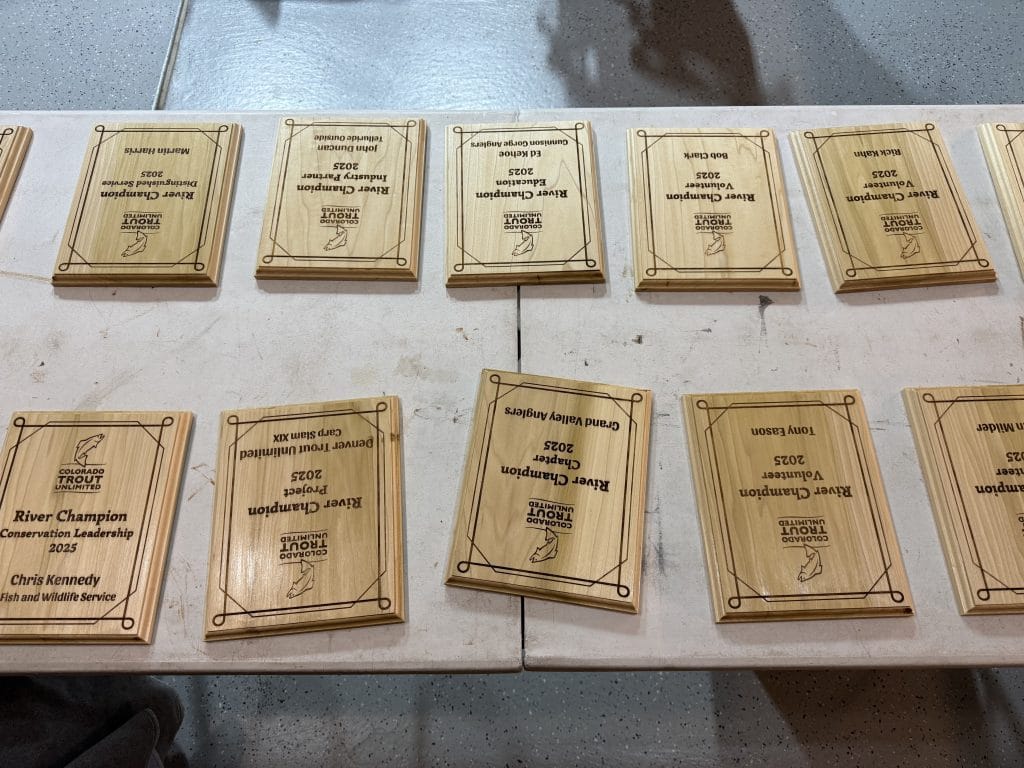
Step nine was the final inspection. I used a tiny screwdriver to pick and scrape out any excess build up from the engravings and around the edges of the plaques. This can happen if you have dust in your workshop that settled overnight, if you did not use a lint-free cloth, or if you were too liberal in the application of the poly. I’ve made all the mistakes!
Step 10 was a final pass with 800 grit sandpaper. It’s just enough to knock down any imperfections from dust and give it a nice smooth finish.
Lessons Learned
The big lesson I learned from this project was in routing the edges. If you’re using a roman ogee bit on poplar, it will cause blow out when you’re running across the grain (specifically, the corner at the end of the run). I wish I’d thought to take a picture, but you probably know what blow out looks like.
The way to prevent blow out is to use a small climb cut at that corner. A climb cut is when you move the wood in the same direction that the router bit is spinning. If you’re using a handheld router, it will feel like the router wants to “climb” the piece of wood. If you’re using a table router, it will feel like the wood wants to “climb” the table. Keep a firm grip and remember you only need to do a little bit at the corner, say 1/4 to 1/2 inch. Then do the full edge in the proper direction.
I practiced on a couple of scraps before doing the awards plaques. I was a little too cautious at first and created burn marks. The burns can be sanded out, but it’s tedious on this type of edge. You need to find the happy medium between not too fast and not too slow.